to close
to close
What is presented below is a method for defining the autonomous period of the robot in XML that is stored on the roboRIO. The XML file should be included in your version control as it is part of your source. However, because it does not need to be compiled, can be modified between runs without redeploying all of the code. This works well when coupled with the types of architecture laid out in the Autonomous tutorial with the results from the XML file taking the place of the controls.
In the project explorer (the window that opens after you finish going through the create project dialogue), right click on Target (roboRIO-XXYY-frc.local) and select New -> Control
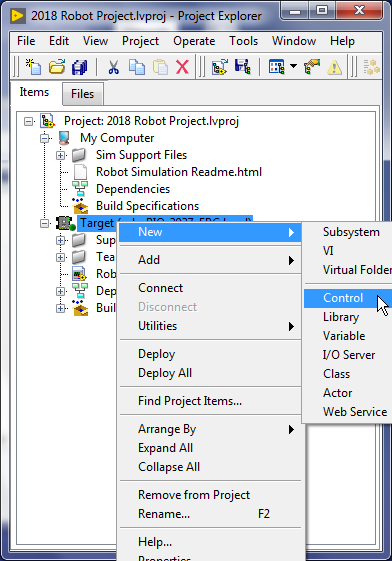
We will use this control to define what an auto move looks like (i.e. how far to move, what direction to turn, whether or not the claw is open, what angle the arm should be at, etc.), but controls are only allowed to have one item in them, so we first add a cluster control.
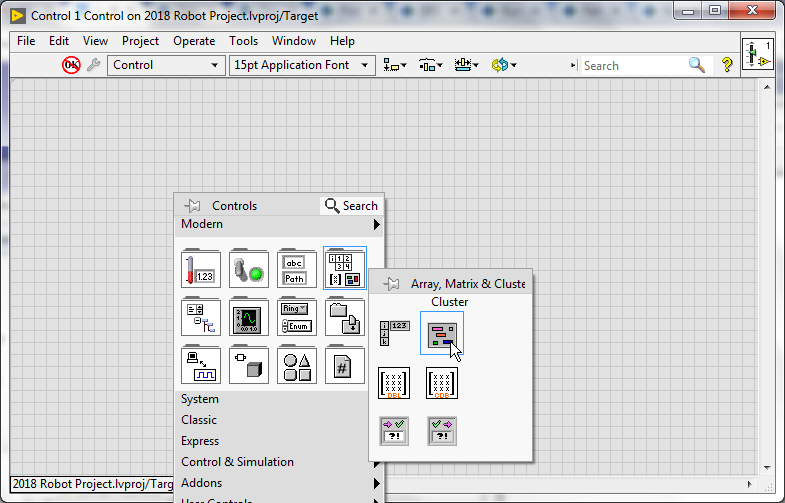
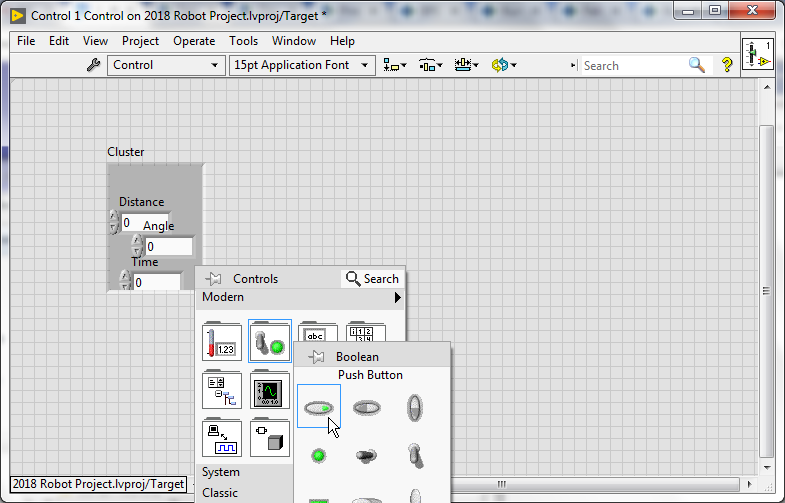
We then add controls to it for each of the parameters that we want to use to define the movement (in this example, we will specify how far in feet -the auto code will translate that to encoder clicks, what direction in degrees, the minimum number of seconds, and whether or not the claw should be open - boolean.)
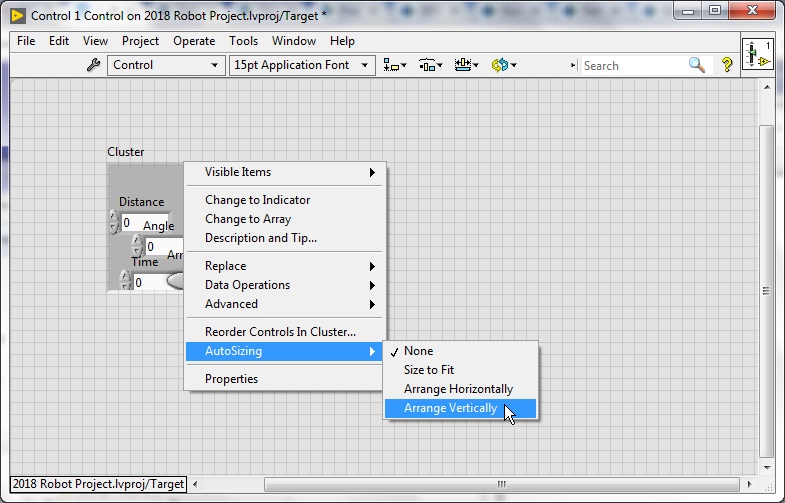
We can set the cluster to arrange them horizontally or vertically, because this definition will be used to display them in the editor and we want it to be a series of steps from left to right, we will choose to ‘array vertically’
So we can easily add or remove items from this later, we will set this as a type def (see also TypeDef tutorial for more info on why TypeDef’s should be used often)
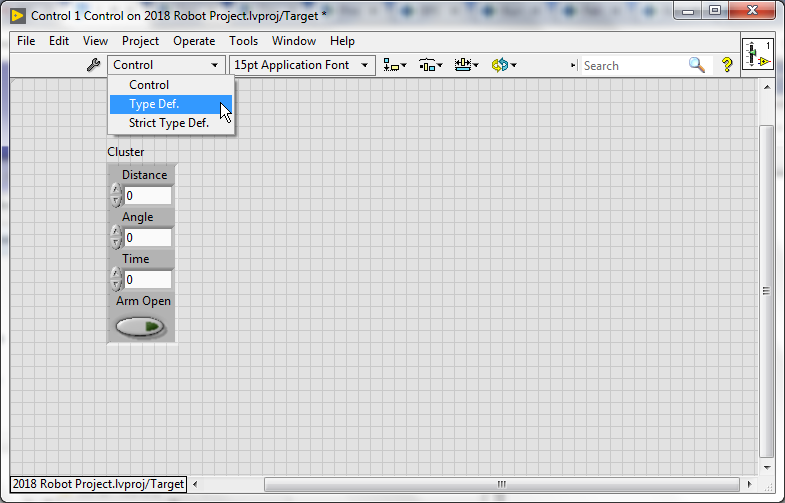
Save the control
Extract the files to where you want to store them. This should be with the rest of your source because EditMoves.vi uses its location to determine where to store the xml file (which you should include in your source control) and where to get the FTP (File Transfer Protocol) program it uses (WinSCP).
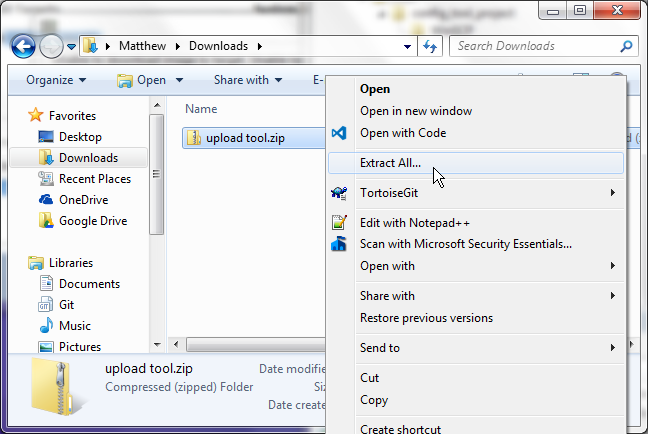
Back in the project explorer, expand and then right click on “My Computer” and select “Add” -> “File . . .”
This will open a file dialogue. Use it to select the EditMoves.vi that you just extracted.
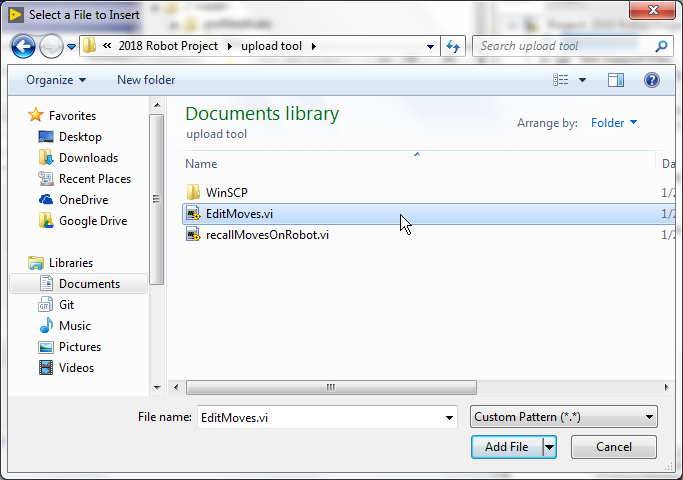
By putting this vi under “My Computer”, you are telling LabVIEW that you want this vi to run locally.
EditMoves.vi is a utility VI that allows for you to put in your own definition of what an autonomous move looks like and build an array of such moves for an auton program. EditMoves will extract xml from the array and store it locally (when save is hit) and put it on the robot for recallMovesOnRobot.vi to load when your autonomous code calls it.
Also add recallMovesOnRobot.vi under the Target (maybe even under “Support Code” or under “Team Code” - it’s up to you).
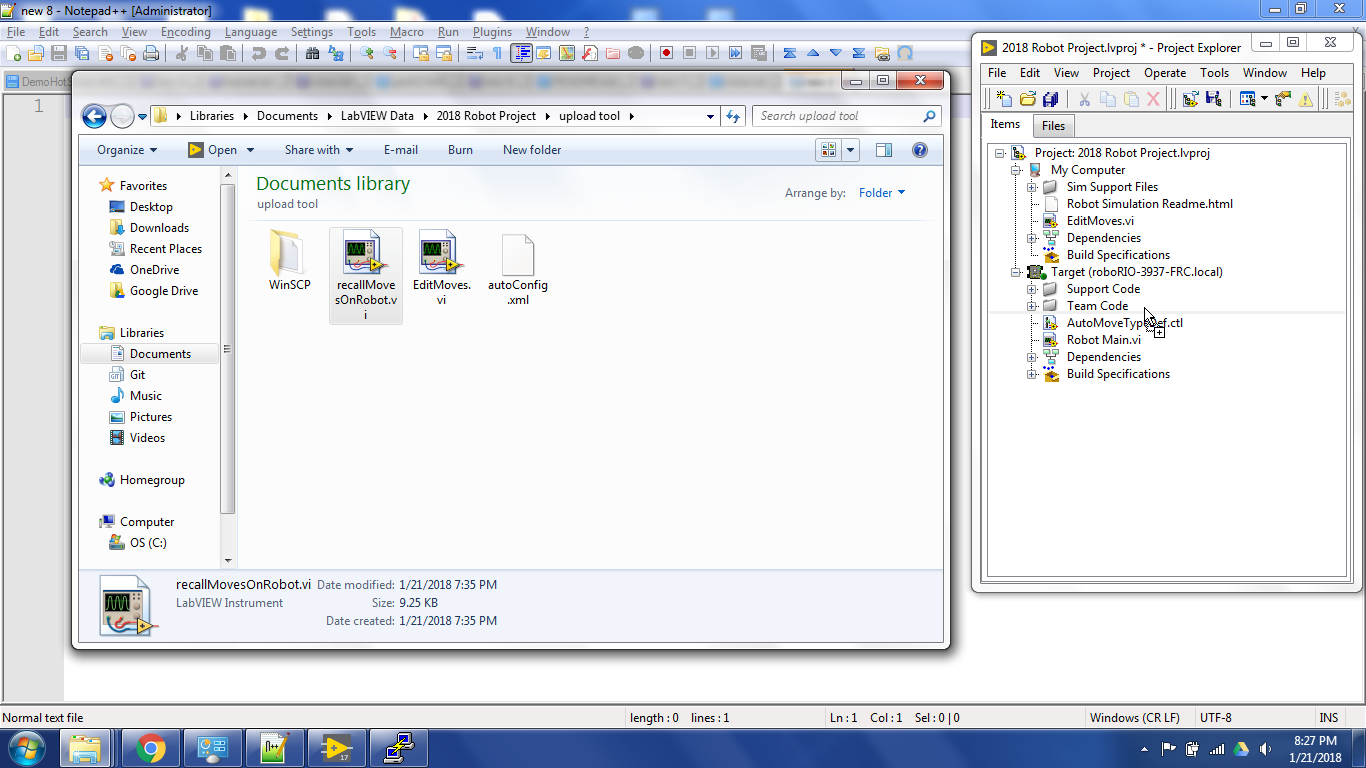
Open EditMoves.vi and put the typedef (that defines an auto move) into the array control
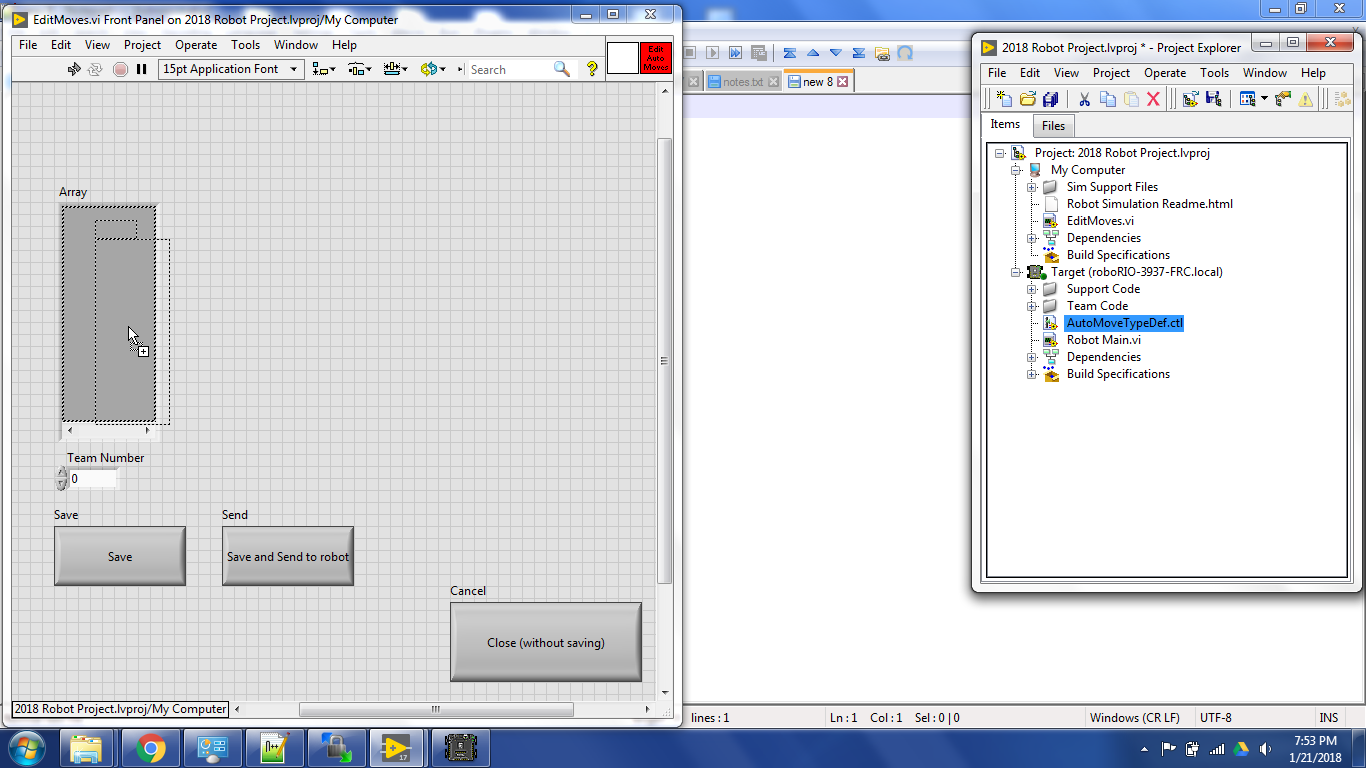
Set your team number in the numeric control (this is used for determining the IP address of the rio to send the xml file to).
Go to “Edit” -> “Make Current Value Default” to store these settings (team number in particular).
Save the vi.
Open recallMovesOnRobot.vi and add your typedef to this array as well.
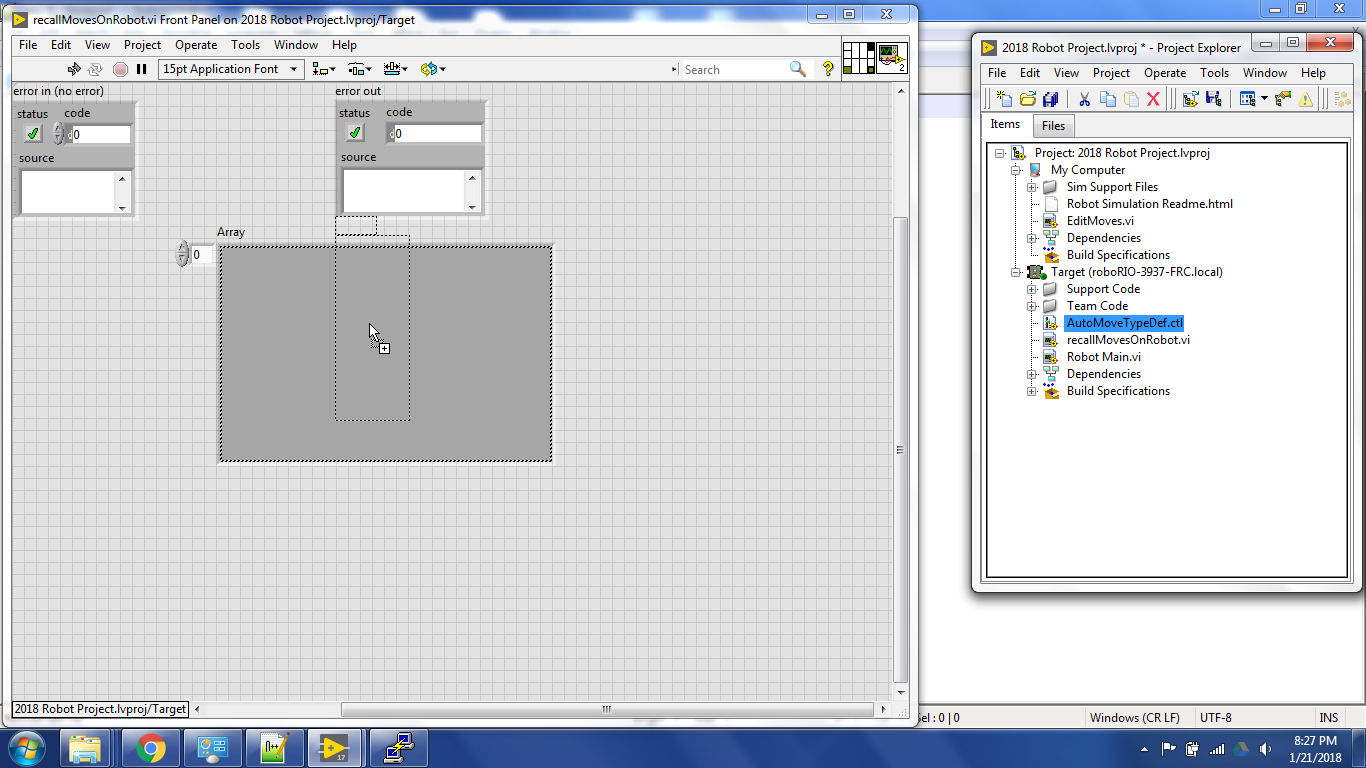
(likely this will still result in a broken VI - right click on the vi and select “change to indicator to fix” if it is broken)
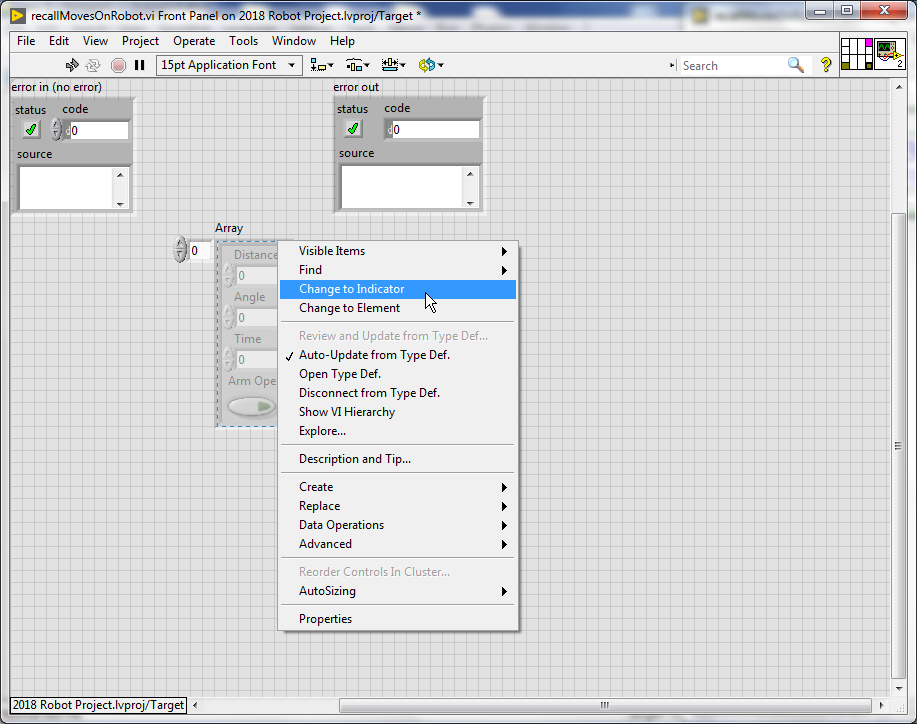
Save the vi.
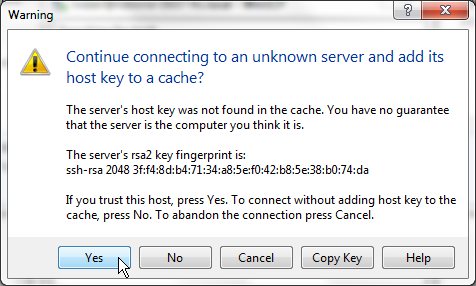
The roboRIO has a unique ssh key that WinSCP (the FTP client that EditMoves uses) will want to store before allowing for automatic transfer.
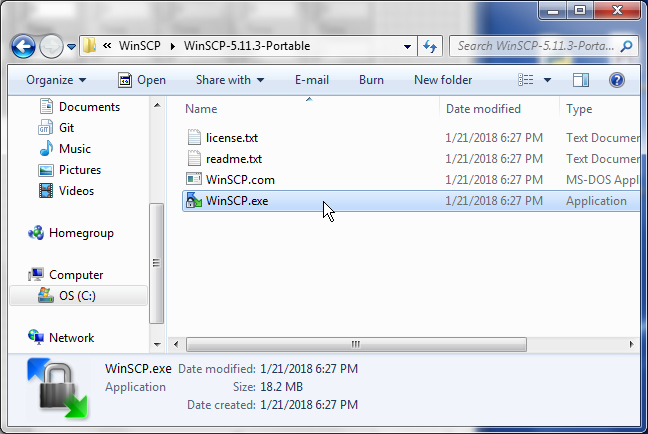
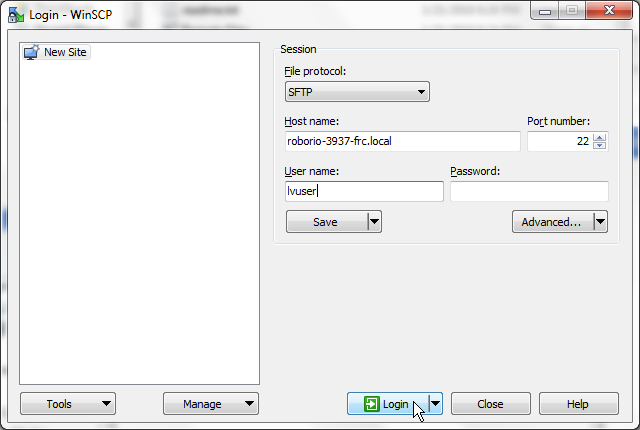
Under the “upload tool” folder we extracted earlier, open WinSCP\WinSCP-5.11.3-Portable\WinSCP.exe
Put “roborio-XXYY-frc.local” (where XXYY is your team number) in the host name.
Put “lvuser” (the user that the program runs as) in the user name (there is no password on this account).
And press Login
When the warning that WinSCP does not recognize the SSH key from the host (unknown host) pops up, select yes (this will continue with the connection and store the SSH key for future connections).
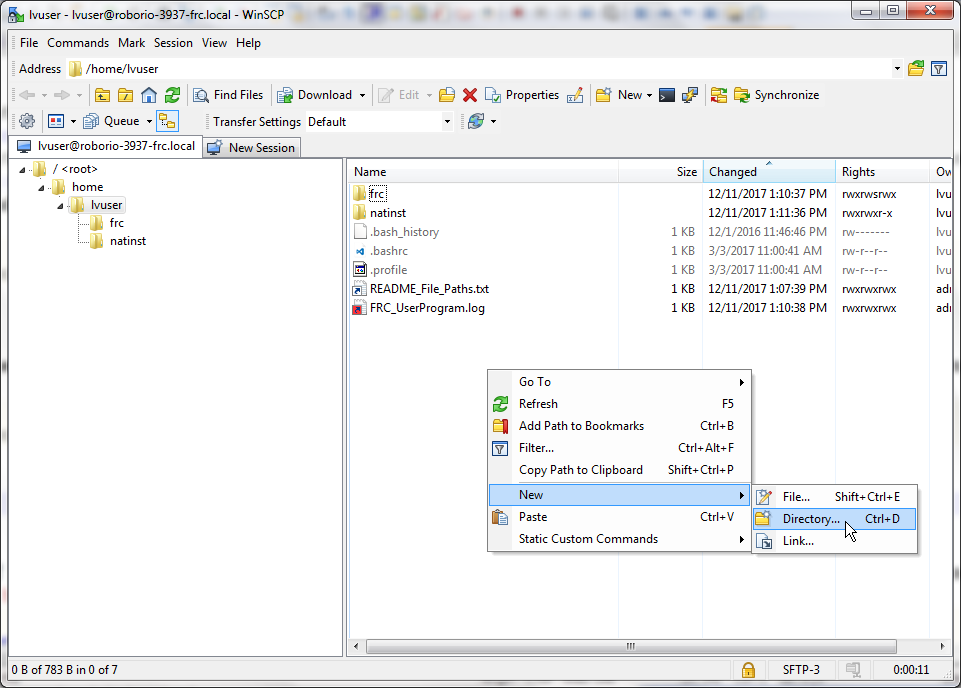
Once connected, right click and select “New” -> “Directory”.
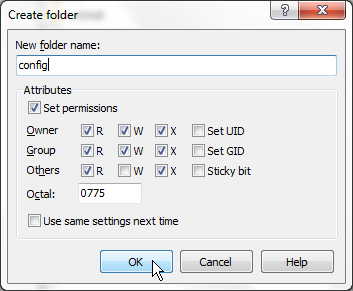
Name it “config” (case sensitive - without the quotes). This is where the xml file will be stored.
Back in EditMoves.vi, run the vi and set some moves. In our example, we’ll configure the robot to go forward 10 feet, turn right 90°, and open the arm (for 1 second).
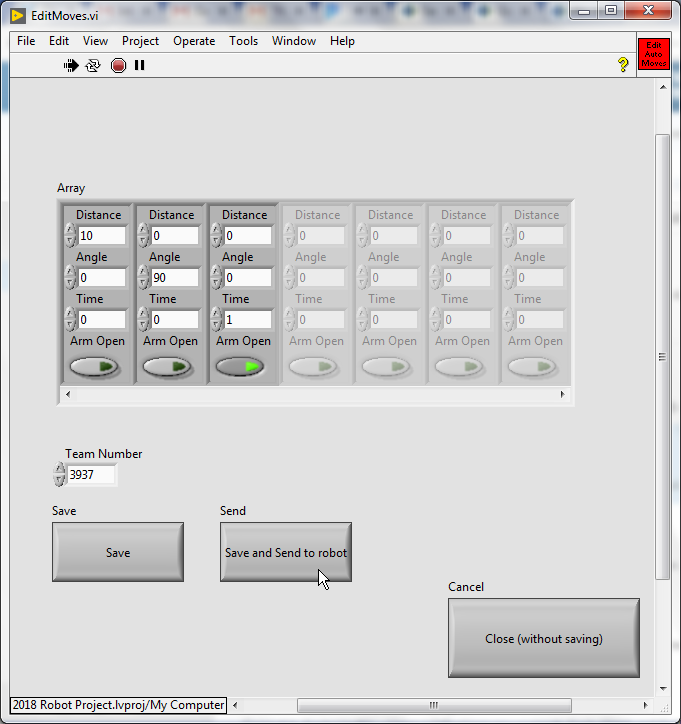
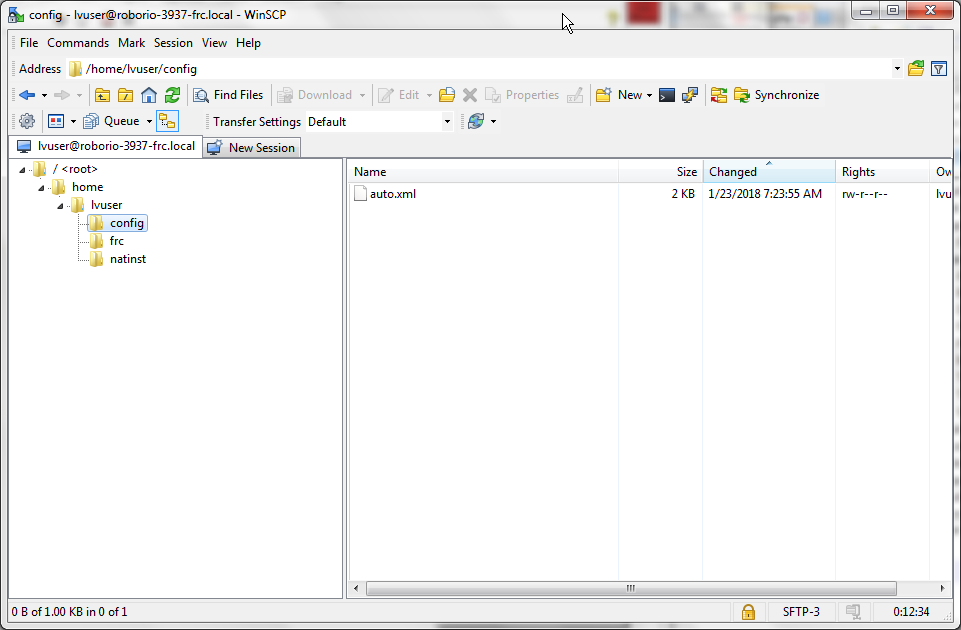
When we press “Save and send to robot”, the array of movements is parsed to xml, stored locally, and copied to the config folder on the roborio. To see the file on the roborio, go back to WinSCP (you may need to refresh it to see the file).
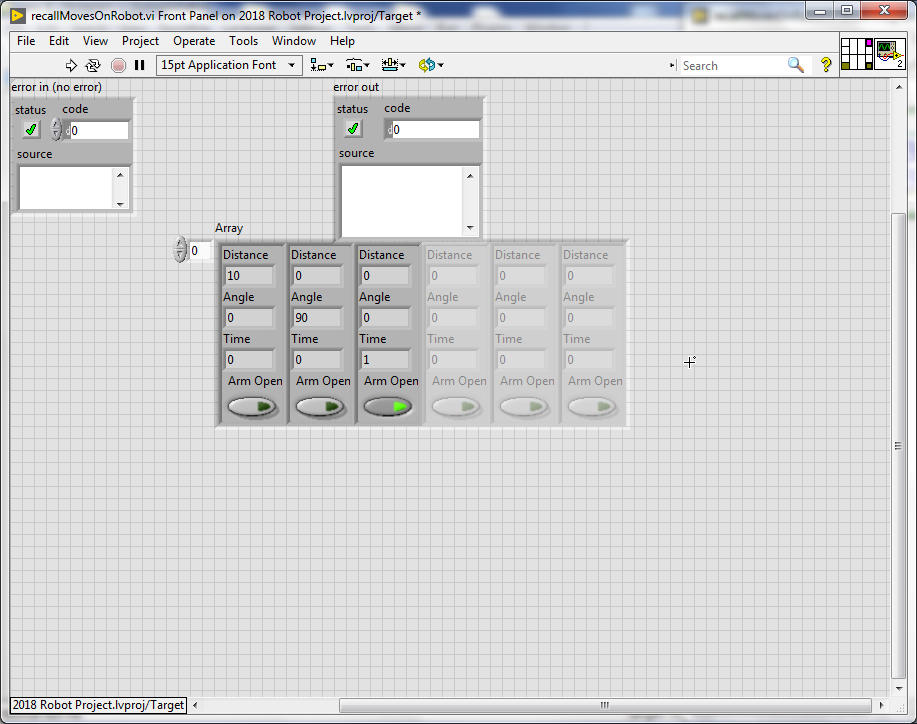
Lastly, we check that we are successfully able to have the robot read it back out of the file.
Go back to recallMovesOnRobot.vi and run it (since it is under the Target in the project, it will deploy and run on the roborio)
If everything worked, you will see the same moves you just stored in EditMoves.vi read back out.
Google Form to request details