to close
to close
When programming a robot, or programming in general, it is often convenient to specify a sequence of steps, but sometimes the program must be able to exit that sequence or start another when instructed to. A good architecture for this is the State Machine (NI documentation here).
The following example implements a state machine for a device that utilizes limit switches wired into the DI\O ports of the RoboRIO. The objective is for a button press to signal the motor to go up until the top limit switch is pressed, then go back down to the bottom limit switch; this will happen un altered unless either a button to go down is pressed sending the actuator down immediately or the up button is pressed again (in which case the sequence is restarted).
Just a formality, but below is the code used to initialize (open) the devices needed for this example.
Due to the constructs of this data structure, it can be implemented in Periodic Tasks or in Teleop, for simplicity’s sake, and to prevent inadvertently causing lag to the drive motion of the robot, this example will show implementation in Periodic Tasks, although it could be done in Teleop.
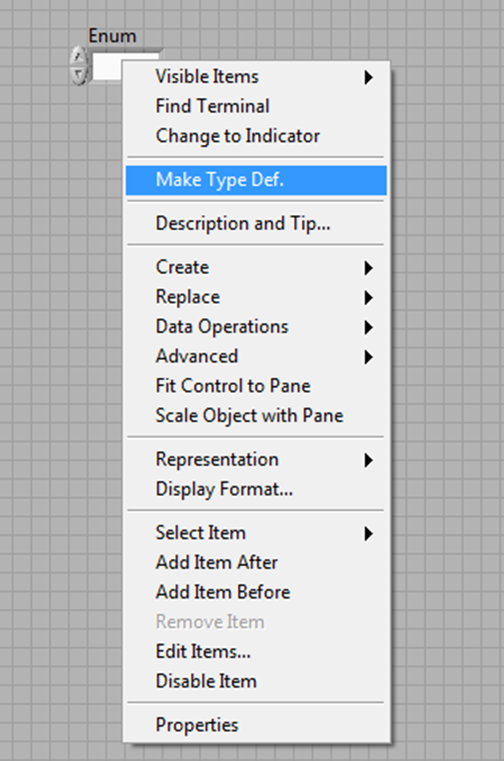
To start, create a enum control on the front panel, and right click on it. From the menu, select “Make Type Def.”

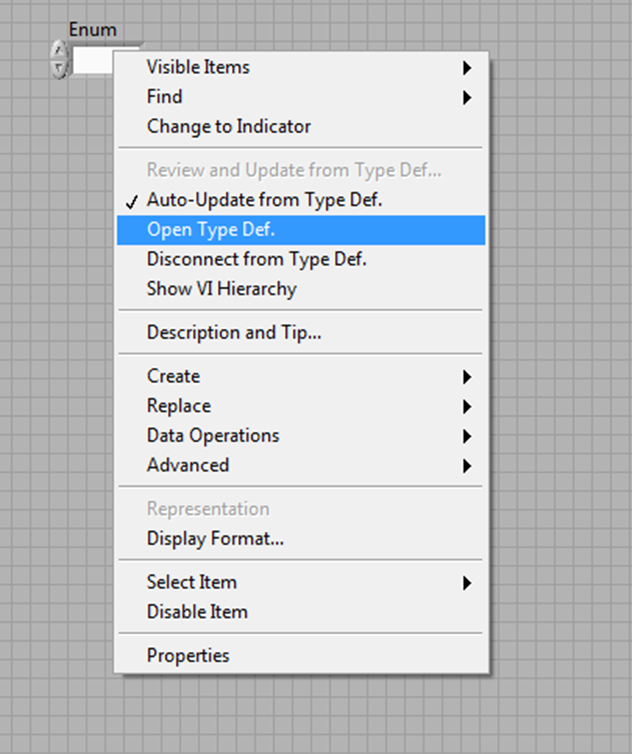
Right click again and select “Open Type Def”

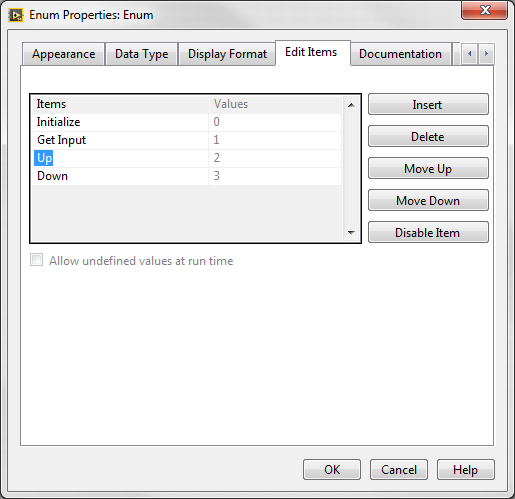
Once the Type Def is open, we can set the items of the enum. For this example the Up, Down, Initialize, and Get Input have been entered.

Back in Periodic Tasks, we use this Type Def to setup the state machine.
A while loop is created for the main body, but some of the more cpu intensive maneuvers are taken care of before entering the loop in this example. In the initialize case, we configure the motor to be stopped, and for the next state to be Get Input
Switching to Up mode next, we configure the motor to go up unless the limit switch is pressed, then stop the motor. Also, the next state is set for Get Input, unless the limit switch is pressed, in which case it is set to Down.
In Down mode, basically the same is accomplished, stopping the motor at the bottom, and constantly checking back for input.
And Finally, the Get Input Mode, here it is realized that we need to return to the previous mode if a button is not pressed, so a second element is added to the state shift register. We also realize that here we want the motor to continue momentarily while we check the joystick, so its value is placed in a shift register. And finally we read the joystick to see if we want to change the direction, otherwise we send out the value of the last iteration (the one before the get value).
This will work, but we realize that we have little bit of over complication. We decided to check for user input between every command to the motor, so we could move that to being a part of the loop and not a state. This change allows us to make the possible state merely: up, down, and stopped. It also simplifies some of the logic and the memory (shift registers) required.
This tutorial is meant to be suggestive of how one might use a state machine architecture in the FIRST Robotics Competition. It will likely need to be modified to fit your specific application.
Google Form to request details